Drosera Farming Airdrop for Node Installation
Drosera is a protocol for incident response in blockchain networks.
Our private Telegram channel – be the first to discover new airdrops! 🚀
The project raised $4.75 million in investments from: Greenfield Capital, Arrington XRP Capital, Paper Ventures, and others.
The project launched a testnet, where in the future, we will be eligible for airdrops for installing a node.
Why participate?
- Only 17,000 node holders are involved in the project.
- Top players are following the project: AltLayer, EigenLayer, ether fi, Swell, and others.
- Drosera is just starting its development: it has already raised investments and promises even more opportunities in the future.
- Drosera node is not resource-intensive and can be easily installed on almost any server.
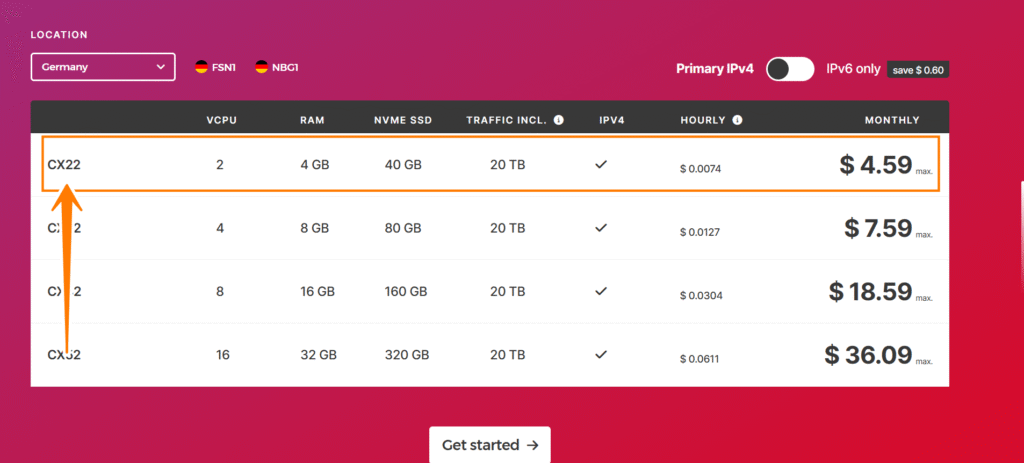
Step 1: Preparing the Server and Purchasing a Server
Recommended system requirements:
- 2 CPU cores
- 4 GB of RAM
- 20 GB of free disk space
- Ubuntu 22.04
Where exactly to buy the server, choose for yourself. I often use the services of https://www.hetzner.com/ – for me personally, it is one of the most reliable data centers.
📌 Step 2: Connecting to the Server
Once you’ve purchased the server, we’ll connect to it to install all the necessary software. The example we will consider is suitable for Windows users.
- Download the PuTTY program, which will allow us to connect to our server.

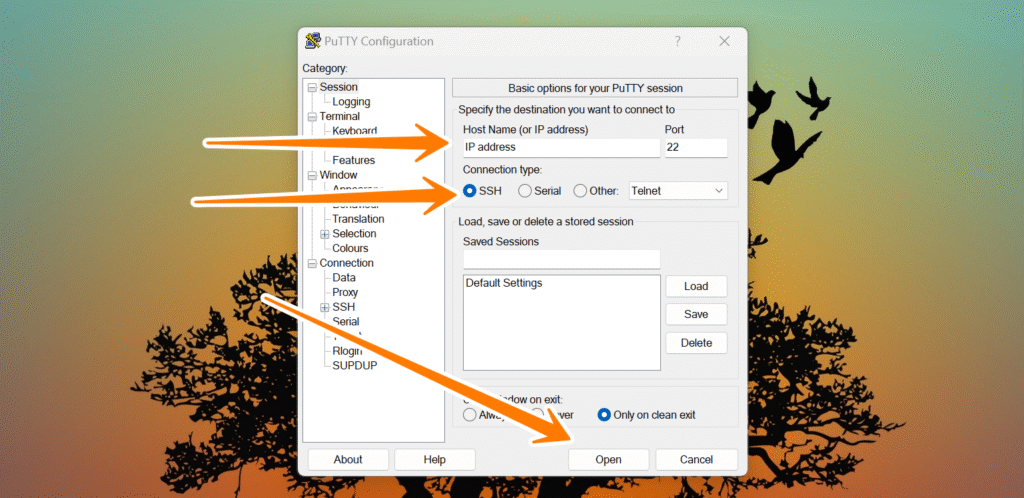
2.1 Working with PuTTY
- Open PuTTY.
- In the Host Name (or IP address) field, enter the IP address of your server (for example, 192.168.1.100).
- In the Connection type section, select SSH.
- Click Open.
- If a window appears asking about trust for the server, click Yes.
- Enter your login (most often this is root).
- Enter the password that was sent to you after purchasing the server and press Enter. (Often, all the data comes to the email you specified during registration, immediately after purchase).
🧰 Step 3: Installing Software on the Server
Copy and paste this command completely into the terminal (it will install all the necessary software):
sudo apt update && sudo apt upgrade -y && \
sudo apt install -y curl ufw iptables build-essential git wget lz4 jq make gcc nano automake autoconf tmux htop unzip
Wait for the process, which may take 2-5 minutes.
📦 Step 3: Downloading and Installing Drosera Node
Enter each line step by step.
cd ~
curl -LO https://github.com/drosera-network/releases/releases/download/v1.0.2/drosera-operator-v1.0.2-x86_64-unknown-linux-gnu.tar.gz
tar -xvf drosera-operator-v1.0.2-x86_64-unknown-linux-gnu.tar.gz
* cd ~ Go to the home directory
* curl – Download the latest version of Drosera Operator (replace v1.0.2 with the latest version if necessary)
* tar – Unpack the archive
✅ Step 4: Checking if Everything is Installed Correctly
./drosera-operator --versionYou should see the version number, for example:
drosera-operator v1.0.2🛡️ Step 5: Registering in the Drosera Network as a Participant
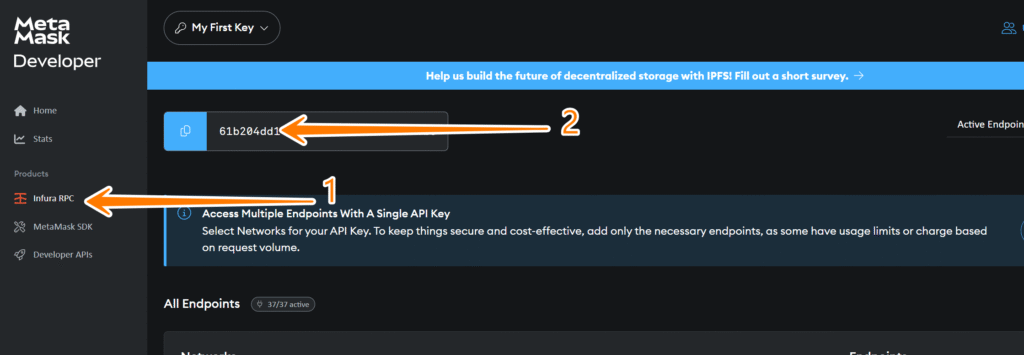
./drosera-operator register --eth-rpc-url https://mainnet.infura.io/v3/YOUR_KEY --eth-private-key 0xYOUR_PRIVATE_KEY⚠️ Important: DO NOT use your main wallet; only use a separate one for this node. Do not share this key with anyone. To get a private key, create, for example, a separate MetaMask wallet, get the private key there, and replace it in the command with 0xYOUR_PRIVATE_KEY.

⚠️ Important: To complete Step 5 and Step 6, you will also need an Infura key. Register at Infura and get your key. Then replace YOUR_KEY in the command.
🚀 Step 6: Starting the Drosera Node
./drosera-operator node --eth-rpc-url https://mainnet.infura.io/v3/YOUR_KEY --eth-private-key 0xYOUR_PRIVATE_KEYIf everything is okay, you will see:
INFO drosera_operator::node: Operator Node successfully spawned!This is a technical task, and if you are a beginner, there may be difficulties ⚠️. The node needs to be maintained and monitored for its performance 🔧. If you have never dealt with installations and are not familiar with the specifics, feel free to skip this task 🚫 and try working with testnets without technical knowledge 👨💻.